Smartphone Settings for Perfect Evening Photos

Chosen theme: Smartphone Settings for Perfect Evening Photos. Welcome! As city lights flicker on and colors deepen, we will fine-tune your phone’s settings so your dusk and night scenes glow with clarity, mood, and magic. Stay with us, try these tips, and share your own results.

Start with the lowest ISO that still holds sharpness. On many phones, ISO 100–400 is ideal for twilight, 800–1600 for darker streets. Raise ISO only when shutter speeds become unusably slow. Noise is better than blur, but denoise lightly later to preserve detail and mood.

Mastering Exposure at Dusk

White Balance and Color Mood After Sunset

Auto white balance often chases changing lights and shifts frames unexpectedly. When possible, lock a Kelvin value between 2800K and 4200K for evening streets. Warmer values feel cozy; cooler values feel urban and sleek. Consistency simplifies editing and keeps your gallery visually coherent.

White Balance and Color Mood After Sunset

Under overlapping tungsten, LED shop signs, and sodium street lamps, perfection is impossible. Meter for your subject and accept some color contrast. Prioritize skin tones or the main subject’s color fidelity. Use selective edits later to tame the wildest casts without flattening the scene’s character.

Focus and Metering in Low Light

Tap and hold to lock focus and exposure on your subject. This prevents shifting when a bus passes or a billboard blinks. Recompose gently after locking. Combine with slight negative exposure compensation to protect highlights and avoid the dreaded overexposed sign dominating your frame.

Focus and Metering in Low Light

Switch to spot metering and sample the brightest portion of the scene, like neon text. This guards against blown highlights. If the rest becomes too dark, lift shadows later. Encourage discussion by sharing screenshots of your spot meter position and the resulting histogram outcomes.

Focus and Metering in Low Light

If your camera app supports manual focus and peaking, use it for low-contrast subjects. Slide focus until edges glow with peaking highlights. For portraits, focus on the eye closest to the camera. Ask readers to try manual focus during blue hour and report their keeper rate improvements.

Harnessing Night Mode and Computational Magic

How Night Mode Stacks Frames

Night mode captures a burst of shorter exposures, aligns them, and averages noise. Hold steady while the progress bar completes. Fine textures improve, and color deepens. Review results at 100% zoom, noting improvements in shadow detail without sacrificing the delicate glow of distant lights.

Tripod Mode and Long Exposures

On a tripod, many phones extend Night mode duration to several seconds. This enhances detail and can create ethereal skies. Use a timer to avoid shake. Compare handheld versus tripod versions and share your best settings so others can replicate your technique on their own devices.

When to Turn Night Mode Off

Turn it off for light trails, intentional motion blur, or moody, contrasty scenes. Night mode can over-smooth texture and freeze the atmosphere. Try standard shooting with RAW or Pro mode instead. Invite readers to post side-by-side examples and vote on which interpretation feels truer.

RAW, HDR, and Noise Reduction Workflow

If available, enable RAW (DNG) for critical shots. You gain highlight recovery and color control, especially under mixed lighting. Expose to protect highlights, then lift shadows carefully. Share your favorite mobile editor and a quick before-and-after so readers can see the RAW advantage clearly.

RAW, HDR, and Noise Reduction Workflow

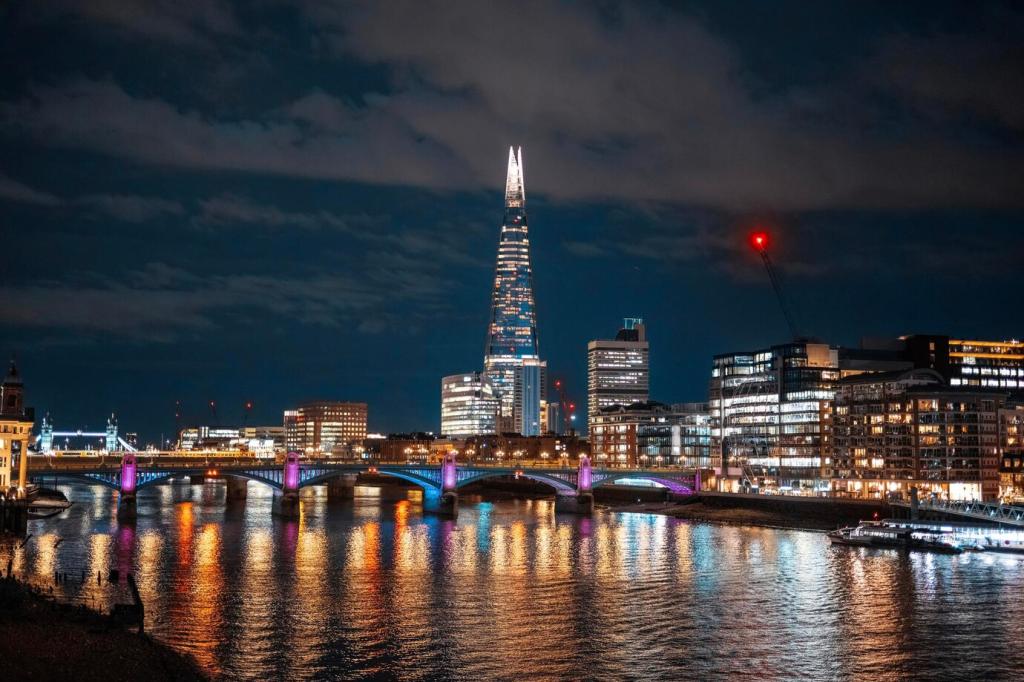
Smart HDR can rescue window signs and street lamps while revealing shadowy alleys. However, it may flatten contrast or introduce halos. Test both RAW and HDR on the same scene, compare micro-contrast, and tell us which feels more faithful to the atmosphere you experienced on location.
Reflections, Rain, and Neon
After rain, lower your angle and underexpose slightly to intensify reflections without blowing highlights. Focus on the reflected subject to create a dreamy double image. Encourage readers to post their favorite puddle shots, including ISO, shutter, and EV, so others can test similar conditions.
Silhouettes and Negative Space
Meter for a glowing sky or sign, let subjects fall to silhouette, and keep backgrounds uncluttered. Use the grid to align horizons and maintain breathing room. Share your silhouette attempts and describe the exact exposure compensation you used, helping others reproduce the same dramatic effect.
Light Trails and Motion Blur
For traffic trails, stabilize your phone, lower ISO, and extend exposure using Night or long-exposure modes. Lock focus on distant lights. Let moving elements paint lines through the frame. Ask readers to compare different shutter durations and discuss how trail length changes perceived energy.
Xplorexbox
Privacy Overview

This website uses cookies so that we can provide you with the best user experience possible. Cookie information is stored in your browser and performs functions such as recognising you when you return to our website and helping our team to understand which sections of the website you find most interesting and useful.